
How to make Oreo dirt cake at home
Craving a fun and delicious dessert that requires zero baking? The Oreo dirt cake recipe is your perfect solution! This easy oreo dessert brings childhood memories to life with its playful presentation and irresistible taste.
Originating in the Midwestern United States, dirt cake has become a beloved treat for gatherings, birthday parties, and summer celebrations. What makes this dessert special is its unique texture and clever design that mimics a garden landscape.
Whether you’re hosting a kids’ party or want a nostalgic dessert, this Oreo dirt cake recipe will impress everyone. With simple ingredients and no oven required, you can create a delightful treat that looks as amazing as it tastes.
Get ready to dive into a step-by-step guide that will transform classic Oreo cookies and creamy ingredients into a dessert that’s sure to become a family favorite. Your culinary adventure starts now!
What is Oreo Dirt Cake: A Classic Midwestern Dessert
Dive into the delightful world of Oreo dirt cake, a playful chocolate oreo dessert that has captured the hearts of dessert lovers across the United States. This whimsical treat is more than just a simple oreo dessert – it’s a culinary experience that brings joy and nostalgia to gatherings and celebrations.
Origins and Popularity
The roots of dirt cake trace back to the Midwestern United States, where home cooks transformed simple ingredients into a creative and delicious dessert. Families began crafting this unique treat as a fun way to delight children and adults alike. Its popularity quickly spread beyond regional boundaries, becoming a beloved dessert at potlucks, family reunions, and special events.
- Originated in Midwestern kitchens
- Quickly became a national favorite
- Beloved at family gatherings
Why It’s Called Dirt Cake
The name might sound unappetizing, but it’s all about the presentation. This chocolate oreo dessert is designed to mimic the appearance of a soil-filled landscape. Crushed Oreo cookies create a realistic “dirt” texture, often topped with gummy worms to complete the playful illusion.
Perfect Occasions to Serve
Your Oreo dirt cake will be a hit at various events. From children’s birthday parties to summer barbecues, this dessert brings excitement and fun to any gathering. Its versatile nature makes it an ideal treat for:
- Kids’ birthday parties
- Summer picnics
- Halloween celebrations
- Themed events
- Family reunions
Whether you’re looking to impress guests or create a memorable dessert experience, Oreo dirt cake promises to deliver both flavor and entertainment.
Essential Ingredients for the Perfect Oreo Dirt Cake Recipe
Creating an amazing oreo dirt cake recipe requires carefully selected ingredients that work together to produce a delightful oreo cream dessert. Your homemade dessert will transform simple ingredients into a magical treat that delights everyone at the table.
The key to an exceptional oreo dirt cake lies in selecting high-quality ingredients. Let’s explore the essential components that will make your dessert truly special:
- 32 Oreo cookies (original or double-stuffed)
- 8 ounces cream cheese, softened
- 1/4 cup butter, softened
- 1 cup powdered sugar
- 2 (3.9 ounce) packages instant chocolate pudding mix
- 3 1/2 cups cold milk
- 12 ounces whipped topping
- 1 teaspoon vanilla extract
Your ingredient selection can make or break the oreo cream dessert. Freshness matters! Choose name-brand ingredients when possible to ensure the best flavor and texture.
| Ingredient Category | Purpose in Recipe | Recommended Type |
|---|---|---|
| Cookies | Creates “dirt” texture | Oreo original or double-stuffed |
| Dairy | Provides creaminess | Full-fat cream cheese and milk |
| Sweet Elements | Adds sweetness | Powdered sugar, whipped topping |
Pro tip: Room temperature ingredients blend more smoothly, ensuring your oreo dirt cake recipe turns out perfectly creamy and delicious.
Kitchen Tools and Equipment Needed
Creating an easy Oreo dessert requires the right kitchen tools to ensure your dirt cake turns out perfectly creamy and delicious. Gathering the necessary equipment beforehand will make your oreo dirt cake recipe preparation smooth and enjoyable.
Preparing an Oreo dirt cake demands a few essential tools that will help you create a delightful dessert with minimal effort. Your kitchen arsenal will determine the success of this delectable treat.
Must-Have Items for Your Oreo Dirt Cake
- Large glass trifle bowl or clear serving dish
- Food processor for crushing Oreo cookies
- Electric mixer or stand mixer
- Mixing bowls in various sizes
- Rubber spatula for smooth mixing
- Measuring cups and spoons
Optional Tools for Decoration
While not crucial, these tools can elevate your easy Oreo dessert presentation:
- Piping bags for creating decorative layers
- Offset spatula for smooth spreading
- Decorative serving spoons
- Cookie cutters for creative cookie crumb shapes
Storage Containers for Preserving Your Dessert
Proper storage is key to maintaining the freshness of your oreo dirt cake recipe. Consider these container options:
- Airtight glass containers with secure lids
- Plastic containers with tight-sealing tops
- Disposable dessert containers for easy transport
Pro tip: Always cover your Oreo dirt cake when storing to prevent moisture loss and maintain its creamy texture.
Step-by-Step Preparation Instructions
Creating a delicious no-bake Oreo dessert is easier than you might think. This oreo dirt cake recipe requires minimal cooking skills and delivers maximum flavor. Let’s break down the preparation process into simple, manageable steps.

Before you start, gather all your ingredients and tools. The key to a successful no-bake oreo dessert is preparation and precision.
- Crush the Oreo Cookies
- Place Oreo cookies in a large resealable bag
- Use a rolling pin to crush into fine crumbs
- Separate about 1/4 of the crumbs for topping
- Prepare the Cream Cheese Mixture
- Soften cream cheese at room temperature
- Beat until smooth and creamy
- Gradually add powdered sugar
- Create the Pudding Layer
- Whisk instant vanilla pudding mix
- Slowly add cold milk
- Stir until mixture thickens
Pro tip: Chill your mixing bowl and utensils beforehand to help ingredients blend more smoothly.
“The secret to a perfect Oreo dirt cake is in the layering and texture!” – Dessert Enthusiasts
Layering is crucial in this oreo dirt cake recipe. Use a clear glass dish to showcase the beautiful layers of crushed cookies and creamy filling.
| Layer | Ingredients | Technique |
|---|---|---|
| Bottom Layer | Crushed Oreo Cookies | Press firmly into pan |
| Middle Layer | Cream Cheese Mixture | Spread evenly |
| Top Layer | Pudding and Whipped Cream | Gentle folding |
Your no-bake Oreo dessert is now ready to chill. Refrigerate for at least 2 hours before serving to allow flavors to meld and texture to set perfectly.
Creating the Creamy Pudding Layer
Crafting the perfect oreo pudding dessert requires careful attention to the creamy layer that gives this classic treat its signature richness. The secret to an outstanding oreo cream dessert lies in perfectly blending each ingredient to create a smooth, decadent texture that melts in your mouth.
Mixing the Pudding Base
Start by gathering your key ingredients for the pudding foundation. You’ll need:
- 1 package instant vanilla pudding mix
- 2 cups cold milk
- 1 cup powdered sugar
Cream Cheese Magic
The cream cheese mixture transforms your oreo pudding dessert from ordinary to extraordinary. Blend softened cream cheese with butter until silky smooth, ensuring no lumps remain.
| Ingredient | Quantity | Preparation Tip |
|---|---|---|
| Cream Cheese | 8 oz | Room temperature |
| Butter | 1/4 cup | Softened |
Incorporating Cool Whip
The final touch for your oreo cream dessert is folding in Cool Whip. Gently mix the whipped topping to maintain its light, airy texture. This step creates a cloud-like consistency that makes your dirt cake irresistibly creamy.
Pro tip: Use a spatula and fold in the Cool Whip in circular motions to keep the mixture fluffy and prevent deflating the whipped cream.
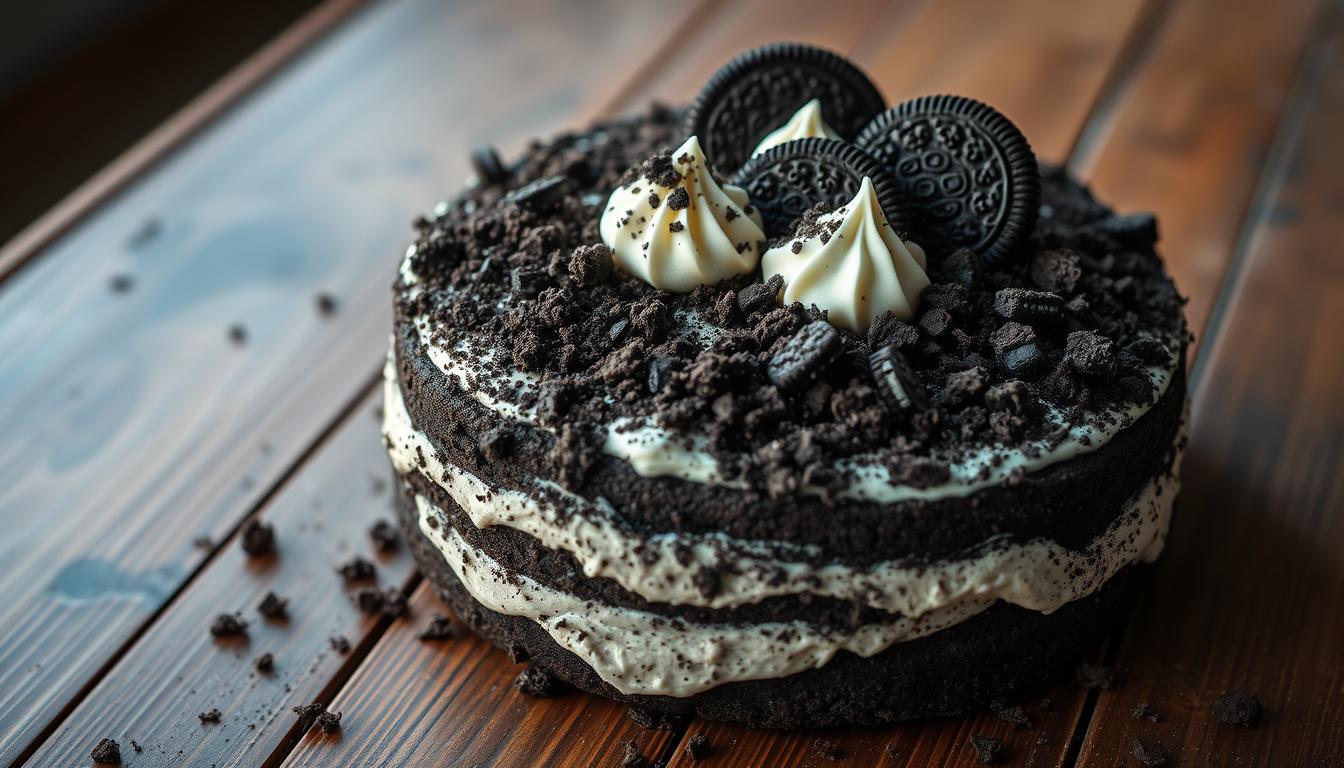
Making the Perfect Oreo “Dirt” Layer
Creating the signature “dirt” layer is the heart of your chocolate oreo dessert. The key to an authentic oreo dirt cake recipe lies in perfectly crushing the Oreo cookies to achieve that distinctive dirt-like texture.
You have two primary methods for crushing Oreos into the signature crumb layer:
- Food Processor Method: Quick and consistent, this technique creates uniform crumbs in seconds
- Manual Crushing Method: Using a plastic bag and rolling pin for a more hands-on approach
For the best results in your chocolate oreo dessert, follow these crushing tips:
- Ensure cookies are completely crushed into fine, even crumbs
- Remove any large cookie chunks that might disrupt the smooth texture
- Keep some cookie filling mixed in for extra richness
Pro tip: Leave some slightly larger crumb pieces to add texture and visual interest to your oreo dirt cake recipe. This subtle variation makes your dessert look more like realistic “dirt” while maintaining an appealing taste and mouthfeel.
The goal is to create a layer that looks like rich, dark soil but tastes like a delightful chocolate treat that will impress both kids and adults alike.
Creative Decoration Ideas and Toppings
Transforming your Oreo dirt cake from a simple dessert to a stunning centerpiece is easier than you might think. With a few creative oreo dirt cake ideas, you can turn this classic treat into a show-stopping dessert that delights guests of all ages.
Your Oreo dirt cake serves as a delicious canvas for countless decoration variations. Let’s explore some exciting ways to make your dessert truly memorable.
Classic Gummy Worm Decoration
The most iconic oreo dirt cake variation starts with adorable gummy worms peeking out from the “soil”. Here are some playful placement ideas:
- Scatter worms randomly across the top
- Create a worm “trail” through the cake
- Cluster worms in one corner for a concentrated effect
Seasonal Decoration Options
Transform your Oreo dirt cake to match any holiday or season with these creative toppings:
| Season/Holiday | Decoration Ideas |
|---|---|
| Easter | Pastel candy sprinkles, chocolate eggs, marshmallow chicks |
| Halloween | Candy corn, chocolate spiders, orange and black sprinkles |
| Christmas | Crushed peppermint, green and red sugar crystals |
Special Occasion Variants
For birthdays or themed parties, consider these unique oreo dirt cake ideas:
- Flower garden theme with edible flowers
- Superhero design using themed candy decorations
- Tropical paradise with coconut “sand” and fruit garnishes
Remember, the key to an amazing Oreo dirt cake is letting your creativity shine. Don’t be afraid to experiment with different toppings and decorations!
Storage Tips and Make-Ahead Instructions
Your delicious oreo dirt cake recipe can be prepared in advance, making it an easy oreo dessert perfect for busy home bakers. Proper storage is key to maintaining the dessert’s fresh taste and creamy texture.

When preparing your oreo dirt cake recipe, consider these essential storage guidelines:
- Refrigerate immediately after preparation
- Store in an airtight container
- Keep refrigerated for up to 3 days
- Avoid freezing to prevent texture changes
For the best make-ahead strategy, follow these simple steps:
- Prepare the pudding and cream cheese layers in advance
- Crush Oreo cookies just before assembly
- Add gummy worm decorations right before serving
- Keep refrigerated until ready to serve
Transporting your easy oreo dessert requires careful handling. Use a sturdy, sealed container with a tight-fitting lid. Keep the dessert chilled during transport by placing it in a cooler with ice packs.
Pro tip: Layer the ingredients carefully to prevent mixing and maintain the signature “dirt” look of your dessert.
When serving, remove the dessert from the refrigerator 10-15 minutes before presentation to allow it to slightly soften, enhancing its creamy texture and delightful flavor.
Conclusion
The Oreo dirt cake recipe offers an exciting and delightful dessert experience that brings joy to any gathering. This classic Midwestern treat is more than just a simple oreo dessert—it’s a creative culinary adventure that allows you to explore your baking skills and imagination.
As you’ve learned through this guide, creating an Oreo dirt cake is surprisingly easy and adaptable. Whether you’re preparing it for a children’s party, family dinner, or a potluck event, your homemade Oreo dirt cake will surely impress guests and satisfy sweet cravings with its rich, creamy texture and playful presentation.
Don’t be afraid to experiment with different decorations, mix in unique ingredients, or create seasonal variations of this beloved dessert. Your personal touch can transform this classic recipe into a memorable treat that reflects your creativity and culinary passion.
We invite you to share your Oreo dirt cake creations with friends, family, and fellow dessert enthusiasts. Each time you make this delightful dish, you’re not just preparing a dessert—you’re crafting a delicious memory that will bring smiles and happiness to those around you.