
Pineapple upside down cake with cake mix
Craving a delightful dessert that brings nostalgic charm to your kitchen? The pineapple upside down cake recipe with cake mix is your perfect solution. This classic treat transforms a simple boxed cake mix into a show-stopping dessert that looks and tastes like it came from a professional bakery.
An easy pineapple upside down cake recipe lets you create a stunning dessert with minimal effort. The magic happens when caramelized pineapple rings transform an ordinary cake into a spectacular centerpiece. With just a few simple ingredients and smart techniques, you can master this beloved dessert in your own kitchen.
Whether you’re preparing for a family gathering or want to treat yourself to something sweet, this recipe offers a foolproof way to impress. The combination of golden cake, buttery caramel, and juicy pineapple creates a dessert that’s both comforting and elegant.
The History and Nostalgia of Pineapple Upside Down Cake
The best pineapple upside down cake has a rich culinary heritage that stretches back to the early 20th century. This beloved dessert emerged during a time of culinary innovation, when home cooks began experimenting with creative ways to showcase canned fruits and convenient baking methods.
Pineapple companies played a significant role in popularizing the classic pineapple upside down cake recipe. In the 1920s, they started printing recipes on can labels, encouraging home bakers to transform simple ingredients into spectacular desserts. The cake quickly became a staple at family gatherings, church potlucks, and community events.
- Originated in the early 1900s
- Popularized by pineapple marketing campaigns
- Became a symbol of mid-century American baking
During the 1950s and 1960s, this dessert reached peak popularity. Cookbooks and women’s magazines featured elaborate versions of the cake, often decorated with maraschino cherries and perfectly arranged pineapple rings. The rise of cake mixes made the recipe even more accessible to home bakers.
| Decade | Culinary Significance |
|---|---|
| 1920s | First recipe publications |
| 1950s | Peak popularity in home baking |
| 1970s | Continued family favorite |
Today, the pineapple upside down cake remains a nostalgic reminder of simpler times. Each slice tells a story of family kitchens, shared meals, and the joy of home baking that continues to connect generations.
Essential Ingredients for Your Pineapple Upside Down Cake
Creating a delicious homemade pineapple upside down cake starts with selecting the right ingredients. Your success depends on choosing quality components that will transform a simple cake mix into a moist pineapple upside down cake that delights everyone at the table.
Let’s dive into the key ingredients that will make your dessert truly spectacular:
Yellow Cake Mix Selection
When picking a cake mix, you have several excellent options:
- Duncan Hines Yellow Cake Mix
- Betty Crocker Pineapple Supreme Cake Mix
- Pillsbury Moist Supreme Yellow Cake Mix
Pineapple Choices: Fresh vs Canned
| Pineapple Type | Pros | Cons |
|---|---|---|
| Fresh Pineapple | Vibrant flavor, natural sweetness | More preparation time, seasonal availability |
| Canned Pineapple | Convenient, consistent texture | Slightly less intense flavor |
Additional Essential Components
To elevate your homemade pineapple upside down cake, include these key ingredients:
- Brown sugar for caramelization
- Unsalted butter
- Maraschino cherries
- Vanilla extract
Pro tip: Always use room temperature ingredients to ensure a smooth, moist pineapple upside down cake that bakes evenly.
Kitchen Tools and Equipment Needed
Creating a simple pineapple upside down cake requires some essential kitchen equipment. Having the right tools can transform your baking experience from complicated to effortless. Let’s explore the must-have items for your quick pineapple upside down cake adventure.
Your primary baking arsenal should include:
- 9×13-inch Baking Dish: The ideal pan for achieving perfect cake dimensions
- Glass Measuring Cups: Ensuring precise ingredient measurements
- Mixing Bowls: For combining cake mix and other ingredients
- Whisk or Electric Mixer: To blend ingredients smoothly
- Cutting Board: For preparing fresh pineapple (if using)
The right equipment makes your simple pineapple upside down cake preparation smooth and enjoyable. A non-stick baking pan can be particularly helpful, reducing the risk of the cake sticking when you flip it.
Pro tip: Invest in quality measuring tools. Accurate measurements are crucial for a perfectly textured quick pineapple upside down cake that will impress your family and friends.
“Baking is about precision, and good tools make all the difference!” – Professional Baker
Optional but helpful tools include a pastry brush for spreading butter, a silicone spatula for scraping batter, and a cooling rack for allowing your cake to set perfectly after baking.
Pineapple Upside Down Cake Recipe with Cake Mix: Step-by-Step Guide
Creating a delicious pineapple upside down cake with cake mix is easier than you might think. This classic dessert combines simple ingredients with a few key techniques to produce a mouthwatering treat that will impress your family and friends.

Your pineapple upside down cake recipe with cake mix will transform an ordinary dessert into an extraordinary experience. Let’s break down the process into manageable steps that ensure success.
Preparing the Topping
Start by gathering your caramelization ingredients. You’ll need:
- 1/4 cup unsalted butter
- 2/3 cup brown sugar
- Maraschino cherries
- Pineapple rings
Melt the butter in a 9-inch round pan, spreading it evenly. Sprinkle brown sugar across the melted butter. Carefully arrange pineapple rings and cherries in a beautiful pattern that will become the stunning top of your delicious pineapple upside down cake.
Mixing the Cake Batter
For the cake portion, you’ll use a yellow cake mix as your base. To elevate the flavor:
- Replace water with pineapple juice
- Add an extra egg for moisture
- Mix according to package instructions
Assembly Instructions
Pour the prepared cake batter gently over the arranged pineapple and cherry topping. The key is to distribute the batter evenly without disturbing your carefully placed fruit design.
Bake at 350°F for approximately 35-40 minutes. Your pineapple upside down cake with cake mix will be ready when a toothpick inserted in the center comes out clean.
The result? A stunning, golden-brown cake with a caramelized fruit topping that’s sure to become a family favorite.
Tips for Perfect Caramelization
Creating the perfect caramelization is crucial for the best pineapple upside down cake. The magic happens when brown sugar and butter transform into a rich, golden layer that defines this classic dessert. Your homemade pineapple upside down cake depends on mastering this delicate process.
To achieve stunning caramelization, consider these key techniques:
- Use dark brown sugar for deeper flavor and color
- Melt butter slowly to prevent burning
- Spread caramel mixture evenly across the pan bottom
- Maintain medium heat during preparation
Temperature control plays a critical role in creating that signature glossy topping. Start by melting butter at a low temperature, then gradually add brown sugar. Stir gently until the mixture becomes smooth and starts to bubble slightly. This process creates the rich caramel base that makes your homemade pineapple upside down cake truly special.
Professional bakers recommend using a cast-iron skillet or heavy-bottomed pan for the most consistent caramelization. The even heat distribution ensures your pineapple rings become perfectly golden and develop a deep, complex flavor.
Pro tip: Watch your caramel closely – the difference between perfect and burned is just moments!
Selecting high-quality ingredients makes a significant difference in your best pineapple upside down cake. Opt for real butter and fresh brown sugar to maximize the caramelization potential. Your attention to these details will transform an ordinary dessert into an extraordinary culinary experience.
Secret Techniques for Extra Moisture
Creating a moist pineapple upside down cake requires some insider baking knowledge. The difference between a good cake and an exceptional one often lies in subtle moisture-enhancing techniques that professional bakers swear by.

Your delicious pineapple upside down cake can reach new levels of moistness with these expert strategies. The secret is understanding how different ingredients and methods can transform your cake’s texture and flavor.
Pineapple Juice: The Moisture Magic Ingredient
Swap out water in your cake mix with pure pineapple juice for an instant moisture boost. This simple substitution adds both liquid and flavor depth to your cake. The natural sugars and acids in pineapple juice help create a more tender crumb.
- Use 100% pineapple juice instead of water
- Measure liquid quantities precisely
- Choose fresh or high-quality canned juice
Post-Baking Moisture Preservation Techniques
After baking your moist pineapple upside down cake, protecting its moisture becomes crucial. Covering the warm cake with plastic wrap or aluminum foil helps trap steam and prevent moisture loss.
| Technique | Moisture Impact | Recommended Duration |
|---|---|---|
| Plastic Wrap Covering | High Moisture Retention | 30-45 minutes |
| Aluminum Foil Wrapping | Moderate Moisture Preservation | 15-30 minutes |
Pro tip: Let your cake cool slightly before covering to prevent condensation from making the top soggy. These techniques ensure your delicious pineapple upside down cake remains irresistibly moist from first slice to last.
Baking Time and Temperature Guidelines
Mastering the perfect easy pineapple upside down cake recipe requires understanding precise baking parameters. Your quick pineapple upside down cake depends on getting the temperature and timing just right.
The ideal baking temperature sits at 350°F (175°C), which creates the perfect golden-brown crust while ensuring the cake’s interior remains moist and tender. Typically, your cake will need approximately 45-50 minutes in the oven.
- Preheat your oven exactly to 350°F
- Use a standard 9-inch round cake pan
- Place the rack in the center of the oven
Check your cake’s doneness using these reliable methods:
- Insert a toothpick into the cake’s center
- Look for a clean toothpick with minimal crumbs
- Gently press the cake’s center – it should spring back
| Oven Temperature | Baking Time | Expected Result |
|---|---|---|
| 350°F (175°C) | 45-50 minutes | Golden brown, moist cake |
Pro tip: Oven temperatures can vary, so start checking your cake around the 40-minute mark to prevent overcooking.
“Precision is the secret to a perfect pineapple upside down cake” – Baking Experts
Proper Cooling and Flipping Techniques
Mastering the art of cooling and flipping your classic pineapple upside down cake can make all the difference in presenting a perfect dessert. The moments after baking are crucial for achieving that picture-perfect result everyone loves.
Cooling your simple pineapple upside down cake requires precision and patience. After removing the cake from the oven, follow these essential steps:
- Let the cake rest in the pan for exactly 10 minutes
- Prepare a flat serving plate or cutting board
- Ensure your work surface is clean and stable
Timing the Flip
Waiting the right amount of time is critical for your classic pineapple upside down cake recipe. If you flip too early, the caramel topping might not set. Wait too long, and the cake could stick to the pan.
Preventing Sticking Issues
To guarantee a smooth release, consider these professional tips:
- Run a thin knife around the pan edges
- Place a plate directly over the cake pan
- Invert quickly and confidently in one smooth motion
- Lift the pan carefully, allowing the cake to settle
If any pineapple pieces stick to the pan, gently replace them on the cake’s surface. Your guests will never know the difference!
Storage and Shelf Life
Preserving the delightful flavor of your best pineapple upside down cake requires careful storage techniques. Your homemade pineapple upside down cake can maintain its delicious taste and texture with proper preservation methods.
For short-term storage, follow these key guidelines:
- Store in an airtight container to prevent moisture loss
- Refrigerate for up to 5 days
- Keep at room temperature for 1-2 days if serving soon
Long-term storage offers even more flexibility for your delectable dessert. Freezing is an excellent option for extending the cake’s life and enjoying it later.
| Storage Method | Duration | Recommended Technique |
|---|---|---|
| Refrigerator Storage | Up to 5 days | Wrap in plastic wrap or store in sealed container |
| Freezer Storage | Up to 3 months | Wrap individual slices in plastic wrap, then aluminum foil |
When freezing your homemade pineapple upside down cake, wrap each slice individually to prevent freezer burn and maintain optimal taste. Thaw frozen cake slices in the refrigerator overnight for the best texture and flavor.
Pro tip: To restore moisture when reheating, warm the cake slice briefly in the microwave or oven, and consider adding a light brush of pineapple juice to revive its original succulence.
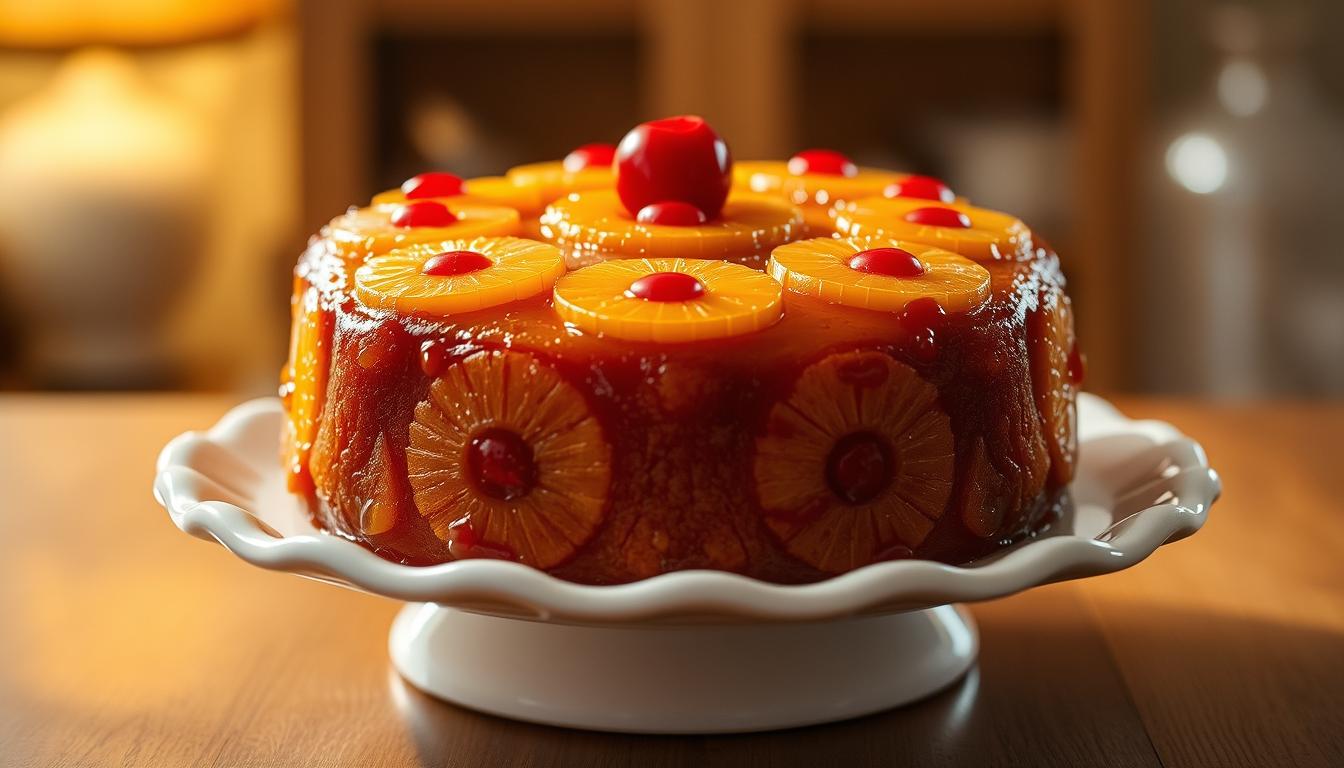
Serving Suggestions and Presentation Ideas
Your classic pineapple upside down cake deserves a stunning presentation that matches its incredible flavor. The right serving techniques can transform this beloved dessert from simple to spectacular.
Elevate your delicious pineapple upside down cake with these creative serving suggestions:
- Pair with cold vanilla ice cream for a temperature contrast
- Add a dollop of freshly whipped cream
- Dust with powdered sugar for elegant finish
- Garnish with fresh mint leaves
Slice your classic pineapple upside down cake carefully to preserve the beautiful caramelized topping. Use a sharp knife and cut smooth, even portions that showcase the golden pineapple rings and rich caramel glaze.
Consider these presentation tips to impress your guests:
- Use a decorative ceramic platter
- Serve slightly warm for maximum flavor
- Create individual plated servings
- Drizzle extra caramel sauce for indulgence
Remember that visual appeal matters as much as taste when serving this iconic dessert. Your guests will appreciate the thoughtful presentation of this timeless treat.
Conclusion
Mastering an easy pineapple upside down cake recipe is within your reach. With the right cake mix and simple techniques, you can transform basic ingredients into a stunning dessert that impresses family and friends. The pineapple upside down cake recipe with cake mix proves that delicious baking doesn’t require advanced culinary skills.
Your journey through this classic dessert reveals how straightforward baking can be. From selecting the perfect yellow cake mix to understanding caramelization techniques, you’ve learned the secrets to creating a moist, flavorful treat. Each step builds confidence in your kitchen abilities, making this recipe an excellent gateway to more adventurous baking projects.
Embrace the nostalgia and joy of baking a dessert that connects generations. Whether you’re preparing it for a family gathering, potluck, or weekend treat, your homemade pineapple upside down cake will become a cherished recipe. Remember that practice makes perfect, and each time you bake, your skills will improve.
The beauty of this dessert lies in its simplicity and versatility. With the knowledge you’ve gained, you’re now equipped to create a delightful centerpiece that will have everyone asking for seconds. So preheat that oven, gather your ingredients, and let your baking adventure begin!