
Betty Crocker pie crust recipe
Every family has a special recipe passed down through generations. Mine is the classic Betty Crocker pie crust recipe. I remember watching my grandmother mix flour and shortening. She made a magical dough that turned into golden, flaky perfection.
Making an easy homemade pie crust might seem hard, but the Betty Crocker tutorial makes it simple. This recipe has helped home bakers for decades. It shows how baking can be easy and rewarding.
Whether you’re new to baking or have lots of experience, the Betty Crocker pie crust recipe is perfect. It helps you make tender, buttery crusts that will wow your family and friends. Let’s explore the secrets to making the perfect pie crust.
Essential Ingredients and Equipment for Perfect Pie Crust
Making a tasty pie crust needs precision and the right tips. Start by knowing the key parts and tools. They turn simple ingredients into a flaky wonder.
Learning to make a flaky pie crust starts with picking top-notch ingredients and tools. The secret to a great pie crust is its simplicity and careful making.
Must-Have Baking Tools
- 9-inch glass pie plate
- Medium mixing bowl
- Pastry blender or fork
- Rolling pin
- Plastic wrap
- Measuring cups and spoons
Essential Ingredients for Pie Crust
The success of your pie crust depends on the right ingredients in the right amounts. Here are the main parts:
- All-purpose flour: The base of your crust
- Salt: Adds flavor and controls gluten
- Cold shortening or butter: Makes the flaky layers
- Ice-cold water: Holds everything together without overworking
Precise Measuring for Perfect Results
Being accurate is key in baking. Use these tips to make sure your pie crust is perfect:
- Spoon flour into measuring cups gently
- Level off ingredients with a straight edge
- Use ice water measured exactly
- Keep ingredients refrigerator-cold
By following these steps, you’ll get closer to making a pie crust that’s both tasty and flaky. Remember, baking gets better with practice!
Betty Crocker Pie Crust Recipe: Step-by-Step Instructions
Making the perfect pie crust is all about precision and care. This recipe will show you how to make a flaky, delicious crust. Follow these steps to get amazing results every time.
First, get all your ingredients and tools ready. The key to a great pie crust is to keep everything cold and handle the dough gently.
- Measure your dry ingredients precisely:
- 2½ cups all-purpose flour
- 1 teaspoon salt
- Cut in cold shortening:
- Use a pastry blender or two knives
- Mix until pieces are pea-sized
- Add ice-cold water gradually:
- Start with 4-5 tablespoons
- Mix until dough just comes together
The secret to the best pie crust is not overmixing. Gently press the dough into a disk, wrap in plastic, and refrigerate for at least one hour. This chilling helps relax the gluten and prevents shrinkage during baking.
Ingredient Proportions for Perfect Pie Crust
| Ingredient | Amount | Purpose |
|---|---|---|
| All-Purpose Flour | 2½ cups | Base structure |
| Salt | 1 teaspoon | Flavor enhancement |
| Cold Shortening | ¾ cup | Creates flakiness |
| Ice Water | 4-5 tablespoons | Binds ingredients |
When rolling out your dough, work quickly and keep the surface lightly floured. Roll from the center outward, rotating the dough to maintain an even thickness. Your patience during this step will result in a tender, flaky crust that’s sure to impress.
Making the Perfect Two-Crust Pie
Making a delicious two-crust pie needs precision and practice. The betty crocker pastry dough tutorial shows a foolproof way to make a stunning homemade pie crust. It will impress your family and friends.
Learning to make easy homemade pie crust involves several key steps. These steps turn simple ingredients into a flaky, delicious pastry.
Mixing the Dough
Begin by dividing your pie dough into two equal parts. One will be the bottom crust, the other the top. Work with chilled dough for the best texture and to prevent sticking.
- Keep dough cold throughout the process
- Handle dough minimally to maintain flakiness
- Use a light touch when combining ingredients
Rolling and Shaping Techniques
When rolling out your pie crust, use a clean surface lightly dusted with flour. Roll from the center outward, making an even circle about 1/8 inch thick. Gentle, consistent pressure is key to uniform thickness.
- Carefully transfer bottom crust to pie plate
- Trim excess dough around edges
- Add pie filling
- Cover with top crust
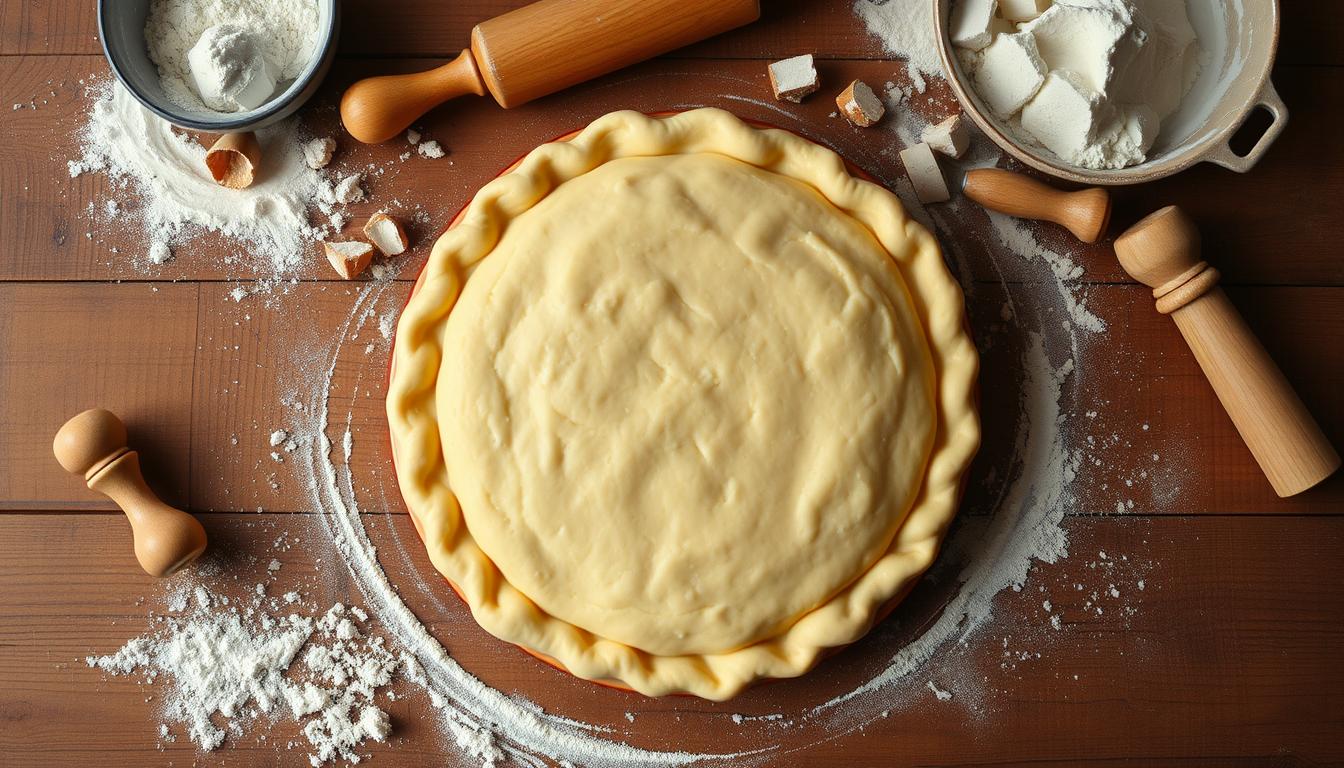
Crimping and Decorative Edges
The final touch of a perfect pie is its decorative edge. Use your fingers to create a classic crimp or try using a fork for a simple, elegant design. Cut small vents in the top crust to allow steam to escape during baking.
Pro tip: Brush the top crust with an egg wash for a beautiful golden finish!
Tips for Creating a Flaky, Tender Crust
Creating a flaky pie crust is all about precision and knowing the right baking techniques. Your journey to a tender crust begins with the perfect texture. The secret to a flaky pie crust lies in several key steps.
Temperature is key for a tender crust. Make sure your ingredients are ice-cold when making the dough. Warm ingredients can melt the fat too soon, leading to a tough crust instead of a flaky one.
- Keep butter and shortening refrigerated until just before use
- Use ice water when mixing pie dough
- Chill dough for at least 30 minutes before rolling
- Handle the dough minimally to prevent gluten development
When working with your pie dough, remember that less is more. Overworking can make the dough tough. Cut the fat into the flour using a pastry cutter or your fingertips, making small, pea-sized pieces.
| Technique | Impact on Crust |
|---|---|
| Cold Ingredients | Prevents fat melting, creates flaky layers |
| Minimal Handling | Reduces gluten development |
| Resting Dough | Allows flour to hydrate, improves texture |
Resting the dough is another important step. After mixing, let the dough rest in the fridge. This lets the flour absorb moisture and the gluten relax. Your crust will be tender and easy to roll, impressing even the most experienced bakers.
Different Types of Pie Crust Fats and Their Effects
Choosing the right fat is key for your pie crust. The fat you pick changes the texture, taste, and quality of your pie.
Each fat has its own special qualities. Knowing these differences will help you make the best pastry every time.
Shortening: The Flaky Champion
Vegetable shortening is great for pie crusts:
- Creates extremely flaky texture
- Provides consistent performance
- Maintains structural integrity at high temperatures
Butter: Flavor’s Best Friend
Butter adds rich flavor and a beautiful golden color. It doesn’t make the crust as flaky as shortening, but many love its taste.
| Fat Type | Flakiness | Flavor | Ease of Use |
|---|---|---|---|
| Shortening | Excellent | Neutral | Very Easy |
| Butter | Good | Rich | Moderate |
| Lard | Outstanding | Savory | Challenging |
Combining Fats for Perfect Results
Professional bakers suggest mixing different fats for the best results. A blend of shortening and butter can give you flaky and tasty crust.
Try different fat mixes to find your ideal pie crust. Remember, the more you practice, the better you’ll get!
Troubleshooting Common Pie Crust Problems

Baking the perfect pie crust can be tough, even for experts. With these tips, you’ll learn to fix common issues and make a flaky pastry every time.
When you’re following the best pie crust instructions, you might face some common problems. These can be frustrating for even the most experienced bakers. Let’s look at some solutions to help you improve your pie-making skills.
- Tough Crust Problem: Overworking your dough can make it tough and chewy. The trick is to handle the dough lightly. Mix ingredients just until they stick together, and don’t over-knead.
- Shrinking Crust Challenge: To stop your crust from shrinking, chill the dough for 30 minutes before baking. This relaxes the gluten and keeps the crust’s shape.
- Soggy Bottom Dilemma: To avoid a soggy bottom, pre-bake your crust or use a pie shield to protect the edges from overcooking.
Temperature is key for the perfect pie crust. Keep your ingredients cold and work fast to keep the butter right. Use a butter knife or pastry cutter for mixing to avoid warming the fat.
Pro tip: Always use ice-cold water and refrigerated butter for the flakiest crust possible!
Practice is essential for pie crust mastery. Don’t worry if your first tries aren’t perfect. Every baking session brings you closer to making the ultimate pie crust.
Storage and Make-Ahead Tips
Learning how to store your betty crocker pastry dough tutorial recipes can save you time. It lets you enjoy homemade pies whenever you like. Storing them right keeps your pie crusts fresh for your next baking project.
When making your easy homemade pie crust, knowing how to store it is key. This keeps its quality and taste perfect. Here are some easy storage tips to keep your pie crusts fresh.
Freezing Instructions for Pie Dough
Freezing is a great way to prep pie crusts ahead of time. Here are some important tips for freezing your betty crocker pastry dough tutorial recipe:
- Wrap unbaked pie dough tightly in plastic wrap
- Place wrapped dough in a freezer-safe bag
- Label with the date and type of crust
- Freeze for up to two months
Proper Storage Methods
Different pies need different storage methods. Here’s a guide to keep your pie crusts in top shape:
| Pie Type | Room Temperature Storage | Refrigerator Storage |
|---|---|---|
| Fruit Pies | Up to 2 days | 3-4 days |
| Cream Pies | Not recommended | 2-3 days |
| Unbaked Dough | Not recommended | 2 days |
When thawing frozen pie crusts, put them in the fridge. Let them thaw slowly over several hours. This keeps their texture and prevents moisture problems with your easy homemade pie crust.
Pro tip: For best results, wrap your pie crusts carefully to prevent freezer burn and maintain their delicate, flaky texture.
Decorative Finishing Touches and Top Crust Variations

Enhancing your pie crust tutorial is more than just baking. The Betty Crocker pie crust recipe offers creative ways to make your pie stand out. Your pie’s look can be as exciting as its taste.
Pie crust decorations let you show off your baking skills. Here are some techniques to make your pie look like a pro’s:
- Lattice Top: Create an elegant woven pattern with dough strips
- Decorative Cut-Outs: Use cookie cutters for unique shapes
- Crumble Topping: Add a rustic touch with a streusel-like crust layer
- Braided Edge: Weave dough strips around the pie’s edge
When using your Betty Crocker pie crust recipe, try these finishing touches:
- Egg Wash: Brush with beaten egg for a golden, glossy look
- Sugar Sprinkle: Dust with coarse sugar for extra texture and shine
- Herb Garnish: Add fresh herbs for a sophisticated look
Remember, practice makes perfect. Each pie is a chance to try new things and find your style. Your guests will love the beautiful presentation of your homemade pie.
Conclusion
Your journey with the step-by-step pie crust recipe comes to an end. But your baking adventures are just starting. The Betty Crocker method gives you a solid base for making delicious pies. These pies will wow your family and friends.
By learning the secrets of a flaky pie crust, you’ve picked up valuable skills. These skills turn simple ingredients into something truly special.
Getting better at pie-making takes practice. Every time you make dough, you’ll get more confident. Just be patient and keep improving.
Whether you’re making a classic apple pie or trying something new, you’re ready. Your skills will help you create amazing dishes in the kitchen.
Pie-making is more than just following a recipe. It’s a tradition that connects families across generations. By mastering this skill, you’re joining a long line of bakers who value homemade comfort and delicious memories.
Now, you’re ready to try new things. From fruit pies to creamy desserts, your pie crust skills will guide you. Enjoy every baking adventure that comes your way.