Simple date nut bread recipe for beginners.
Every kitchen has a special recipe that turns simple ingredients into something amazing. For me, the date nut bread recipe is that magic. Imagine stepping into your kitchen on a cool morning. The smell of freshly baked bread fills the air, bringing comfort and joy.
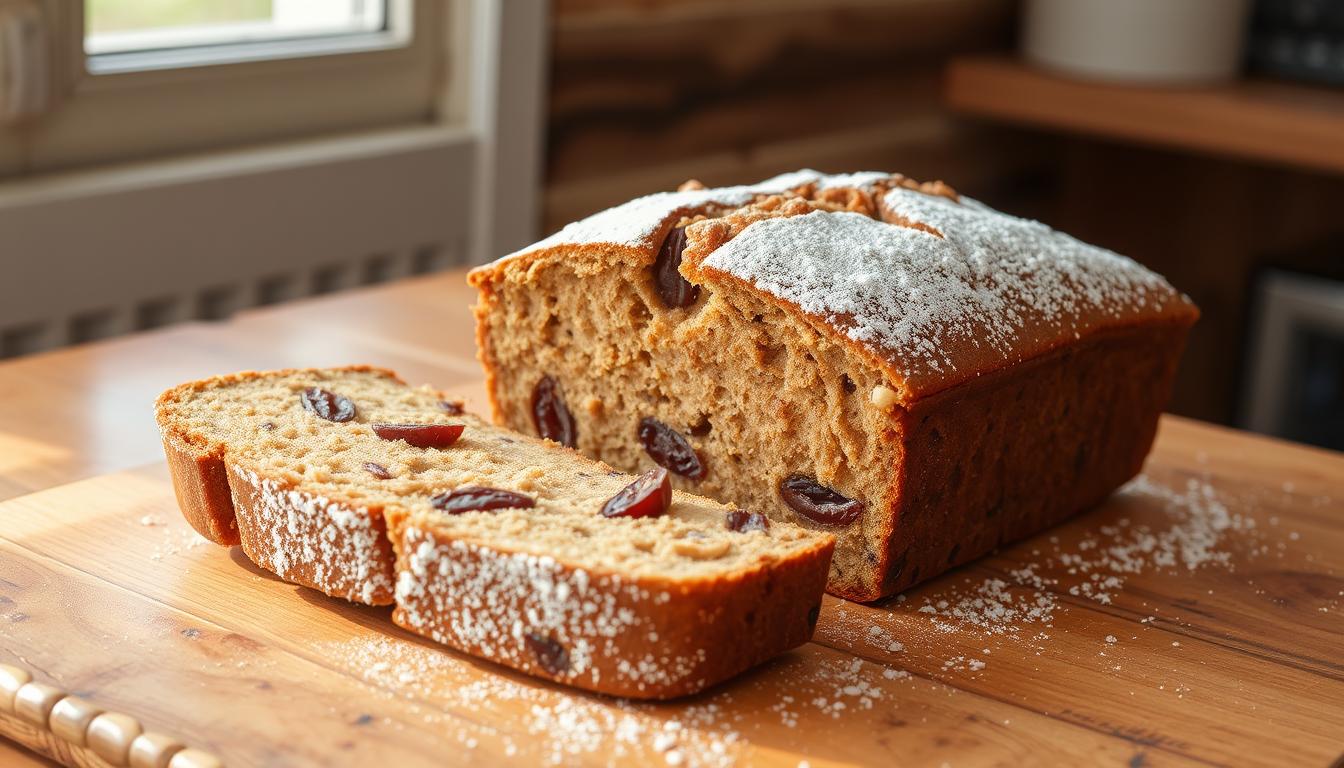
This easy date nut bread recipe is more than just a recipe. It’s a way to build your baking confidence. Whether you’re new to baking or have experience, this recipe will become your go-to comfort food. It’s sweet from the dates and crunchy from the nuts, great for any time of day.
Making delicious date nut bread is easier than you think. You only need basic ingredients and a little baking know-how. You’ll make a moist, tasty bread that will wow everyone. No fancy techniques or special tools needed, just simple ingredients and a love for baking.
Are you ready for a tasty baking journey? Let’s explore the world of homemade date nut bread. Every slice is a story of warmth, tradition, and joy in the kitchen.
Why This Classic Date Nut Bread is Perfect for Home Baking
Making homemade date nut bread is more than baking. It’s a fun experience that combines nutrition, flavor, and comfort. The best recipe for date nut bread uses wholesome ingredients, making it a favorite among home bakers.
Health Benefits of Dates and Nuts
Your homemade date nut bread is not only tasty but also very nutritious. Dates add natural sweetness and lots of nutrients. Nuts bring proteins and healthy fats.
- Dates provide fiber and essential minerals
- Nuts offer heart-healthy omega-3 fatty acids
- Together, they make a bread full of nutrients
Perfect Occasions for Serving
This bread is great for many occasions. It’s perfect for a quick breakfast, an afternoon snack, or a fancy dessert. Its rich taste and soft texture make it a hit at any gathering.
| Occasion | Serving Suggestion |
|---|---|
| Breakfast | Toasted with butter |
| Afternoon Tea | Served with cream cheese |
| Dessert | Paired with vanilla ice cream |
Storage and Shelf Life
Storing your homemade date nut bread right keeps it fresh and tasty. With the right methods, you can enjoy it for days or even weeks.
- Room temperature: 2-3 days
- Refrigerated: Up to 5 days
- Frozen: Up to 3 months
Pro tip: Wrap your bread tightly in plastic wrap or store in an airtight container to keep it moist and fresh.
Essential Ingredients for Your Date Nut Bread Recipe
Making the perfect moist date nut bread starts with choosing top-notch ingredients. The quality of your classic date nut bread depends on the ingredients you pick. Let’s explore the key elements that will make your baking a success.
Creating an amazing date nut bread means picking each ingredient with care. The right choices can turn your baking from good to great.
Choosing the Right Dates
Dates are the core of your classic date nut bread. Not all dates are the same. Medjool dates are the best choice for bakers looking for the best flavor and moisture. These plump, caramel-like fruits offer:
- Rich, natural sweetness
- Soft, creamy texture
- High moisture content
- Exceptional depth of flavor
Best Nuts for the Recipe
The nuts you choose can greatly affect your moist date nut bread’s texture and taste. Here are some top picks:
- Walnuts: Traditional and robust
- Pecans: Sweet and buttery
- Almonds: Delicate and crunchy
Required Kitchen Tools
Before you start baking, make sure you have these essential tools:
- 9×5 inch loaf pan
- Large mixing bowl
- Whisk or electric mixer
- Measuring cups and spoons
- Cooling rack
With these ingredients and tools, you’re all set to make a delicious date nut bread that will wow your family and friends.
Step-by-Step Date Nut Bread Recipe
Making an easy date nut bread recipe is easier than you think. It only needs a few ingredients and simple steps. This recipe is great for both new and experienced bakers.
First, collect all your ingredients for a smooth baking process. Here’s what you’ll need for this tasty bread:
- 2 cups all-purpose flour
- 1 teaspoon baking soda
- 1/2 teaspoon salt
- 1/2 cup unsalted butter, softened
- 3/4 cup brown sugar
- 2 large eggs
- 1 teaspoon vanilla extract
- 1 cup chopped dates
- 1 cup chopped nuts (walnuts or pecans)
The secret to a great date nut bread is in the prep. Start by heating your oven to 350°F (175°C) and grease a 9×5 inch loaf pan. Mixing your ingredients right is key for the perfect texture.
- In a medium bowl, whisk together flour, baking soda, and salt
- In a separate large bowl, cream butter and brown sugar until light and fluffy
- Beat in eggs one at a time, then add vanilla extract
- Gradually mix dry ingredients into the wet mixture
- Fold in chopped dates and nuts
- Pour batter into prepared loaf pan
- Bake for 50-60 minutes or until a toothpick comes out clean
“Baking is love made edible.” – Unknown
Pro tip for your easy date nut bread: Let the bread cool completely before slicing. This ensures clean, perfect cuts. Your homemade date nut bread will stay fresh for up to 5 days when stored in an airtight container at room temperature.
Tips for Achieving the Perfect Texture and Moisture
Making a moist date nut bread needs care and focus. It’s not just about the ingredients. It’s also about the baking techniques that make it soft and tasty.
Avoiding Common Baking Pitfalls
Baking the perfect moist date nut bread can be tricky. Some common mistakes to avoid include:
- Overmixing the batter, which can make the bread tough and dense
- Using old or stale ingredients that affect the flavor
- Incorrectly measuring dry and wet ingredients
- Opening the oven door too often during baking
Temperature and Timing Secrets
Getting the temperature right is key for a moist date nut bread. Here are some expert tips:
- Preheat your oven to exactly 325°F (165°C)
- Bake for about 55-65 minutes
- Use the toothpick test to check if it’s done
“The difference between good and great baking is often in the details.” – Professional Baker’s Wisdom
To keep your date nut bread incredibly moist, wrap it in plastic wrap after it cools. This keeps the moisture in and makes it fresh for days.
Gluten-Free Date Nut Bread Variations
Making a tasty homemade date nut bread for those with gluten sensitivities is simple. Gluten-free baking lets you enjoy this classic treat without sacrificing taste or texture.
When baking a gluten-free healthy date nut bread, look for flour substitutes for wheat flour. Great options include:
- Almond flour
- Coconut flour
- Gluten-free all-purpose flour blend
- Rice flour
Finding the right binding agent is crucial for a gluten-free homemade date nut bread. Xanthan gum is your go-to, helping to replace gluten’s role. Use about 1/2 teaspoon per cup of gluten-free flour for the best texture.
Here are some baking tips for your gluten-free version:
- Measure ingredients precisely
- Mix dry ingredients thoroughly
- Allow extra resting time for flour to absorb moisture
- Check for doneness with a toothpick
Don’t worry if your first try isn’t perfect. Gluten-free baking takes practice, but the outcome can be just as wonderful as traditional recipes. Your loved ones will love this healthy date nut bread just as much!
Pro tip: Always check ingredient labels to ensure complete gluten-free compliance.
Creative Ways to Customize Your Date Nut Bread
Turn your traditional date nut bread recipe into a fun adventure with new flavors and ways to serve it. The best date nut bread recipe is about making it your own.

Flavor Enhancements to Elevate Your Bread
Try these exciting additions to bring out new tastes:
- Citrus zests (orange or lemon)
- Warming spices like cinnamon or nutmeg
- Splash of bourbon or rum
- Dark chocolate chips
- Toasted coconut flakes
Innovative Serving Suggestions
Your homemade date nut bread can be enjoyed in many ways:
| Serving Style | Recommended Pairings |
|---|---|
| Breakfast | Cream cheese, honey, ricotta |
| Snack | Butter, jam, mascarpone |
| Dessert | Vanilla ice cream, caramel sauce |
Pro tip: Lightly toast your date nut bread slices to enhance their rich, nutty flavor profile.
With these creative ideas, your traditional date nut bread recipe will become a versatile masterpiece. It will delight everyone who tries it.
Making Date Nut Muffins from the Same Recipe
Turn your homemade date nut bread into tasty muffins with a few tweaks. This recipe lets you make individual treats. They’re great for breakfast, snacks, or any casual event.
To make muffins from your date nut bread, follow these steps:
- Use the same batter from your date nut bread recipe
- Grease a muffin tin or line with paper liners
- Adjust baking temperature to 350°F
- Reduce baking time to 18-25 minutes
Muffins have many benefits over loaf bread. They’re great for portion control and perfect for quick breakfasts. You can also add your favorite mix-ins to the batter:
- Chocolate chips
- Chopped nuts
- Dried fruit
- Streusel topping
Pro tip: Check if your muffins are done by inserting a toothpick into the center. If it comes out clean, they’re ready to eat!
“Baking is love made edible” – Unknown
Professional Baking Techniques for Home Bakers

Mastering the best date nut bread recipe is more than just following a recipe. Professional bakers know that precision and technique make a big difference. They turn an ordinary bake into an extraordinary treat.
Measuring ingredients accurately is key to perfect baked goods. Get a digital kitchen scale for this. It ensures you get consistent results every time.
- Use room temperature ingredients for better mixing
- Sift dry ingredients to remove lumps
- Measure liquids at eye level for precision
Knowing the right temperatures for ingredients can really help. Butter and eggs should be at room temperature. This makes the batter smoother and the bread texture even.
| Ingredient | Ideal Temperature | Reason |
|---|---|---|
| Butter | 65-70°F | Better incorporation with sugar |
| Eggs | Room temperature | Improved volume and texture |
| Milk | 70°F | Consistent mixing |
To check if your bread is done, don’t just use a toothpick. Professional bakers suggest using an instant-read thermometer. The bread’s internal temperature should be 200-205°F for perfect baking.
Pro tip: Rest your bread for 10 minutes after baking to allow moisture to redistribute.
By practicing these techniques, you can improve your home baking. You’ll make date nut bread that will wow your family and friends.
Nutritional Information and Dietary Considerations
Knowing the nutritional facts of your healthy date nut bread helps you make better food choices. This traditional recipe is not just tasty but also packed with nutrients. It’s a great option for many diets.
A slice of this bread has about 155 calories. It’s a good choice for those watching their calorie intake. It has a good mix of nutrients that support your health.
Caloric Content and Macronutrients
Here’s a look at the key nutrients in healthy date nut bread:
- Calories: Around 155 per slice
- Protein: 3-4 grams
- Carbohydrates: 20-22 grams
- Healthy Fats: 7-9 grams
- Fiber: 2-3 grams
Dietary Adaptations
You can easily change your traditional date nut bread recipe for different diets:
- Gluten-Free Option: Use almond or coconut flour instead of wheat flour
- Low-Sugar Version: Try stevia or use fewer dates
- Vegan Adaptation: Replace eggs with flax eggs or applesauce
- Keto-Friendly: Use low-carb flour and less dates
With this knowledge, you can enjoy your date nut bread while keeping up with your health goals.
Conclusion
Learning to make date nut bread is a fun journey that mixes health with tasty flavors. Your homemade date nut bread can become a favorite in your kitchen. It’s a simple yet elegant treat that everyone will enjoy.
This recipe lets you try out different nuts, spices, and special diets. It’s perfect for a healthy breakfast or a tasty snack. Your homemade bread will wow everyone with its rich taste and healthy ingredients.
We encourage you to dive into home baking with this date nut bread recipe. Share your baking stories, post pictures of your bread, and ask questions. Your baking journey is special, and every slice tells a story of creativity and love in the kitchen.
Baking is an art that gets better with time. Every time you bake this recipe, you’ll learn something new and get better. Enjoy the process, savor the delicious outcomes, and keep exploring the amazing world of homemade bread.

