
Step-by-step snow ice cream recipe for beginners
Winter’s first snowfall always brings back childhood memories of excitement and pure joy. As a kid growing up in Minnesota, I remember racing outside with my grandmother’s special bowl. We caught snowflakes and turned them into the most magical dessert imaginable.
The homemade snow ice cream recipe was our family’s treasured winter tradition. It’s not just about mixing ingredients. It’s about capturing winter’s magic in a bowl.
This simple treat takes only 5 minutes to prepare and requires just 4 basic ingredients. Whether you’re a parent looking to create memories with your children or a winter enthusiast seeking a unique dessert, this guide will walk you through every delightful step.
Imagine turning fresh, pristine snow into a creamy, sweet treat. This treat brings smiles and warmth to cold winter days. Your snow ice cream adventure starts right here, promising a fun, delicious experience that connects you with nature’s sweetest seasonal gift.
What is Snow Ice Cream: A Winter Treat Introduction
Snow ice cream is a fun winter tradition that turns snow into a sweet treat. Your family can make this easy recipe with ingredients from your kitchen. It’s a treat that has fascinated winter lovers for years.
Traditional snow ice cream is more than a dessert. It’s a special winter memory that brings families together. Making it is both fun and nostalgic.
Origins of Traditional Snow Ice Cream
The history of snow ice cream goes back to early American settlers. They used what they had to make a tasty dessert from snow. Native communities and frontier families found creative ways to enjoy snow.
- Pioneer families first documented snow ice cream recipes
- Rural communities developed unique preparation methods
- Winter celebrations often featured this homemade treat
Enduring Winter Popularity
Snow ice cream remains popular for several reasons:
- It’s made with low-cost ingredients
- It’s easy to make
- It’s a fun family activity
- It brings back nostalgic winter memories
Safety First: Snow Collection Guidelines
Before making snow ice cream, it’s important to know about snow safety. Not all snow is safe to eat. Use clean, fresh snow from unpolluted areas for a safe and tasty treat.
| Snow Collection Safety Tips | Recommended Action |
|---|---|
| Snow Location | Collect from open, untouched areas away from roads |
| Snow Color | Use pure white snow, avoiding discolored patches |
| Collection Time | Gather immediately after fresh snowfall |
Remember, the joy of traditional snow ice cream lies in its simplicity and the memories you create while making it together.
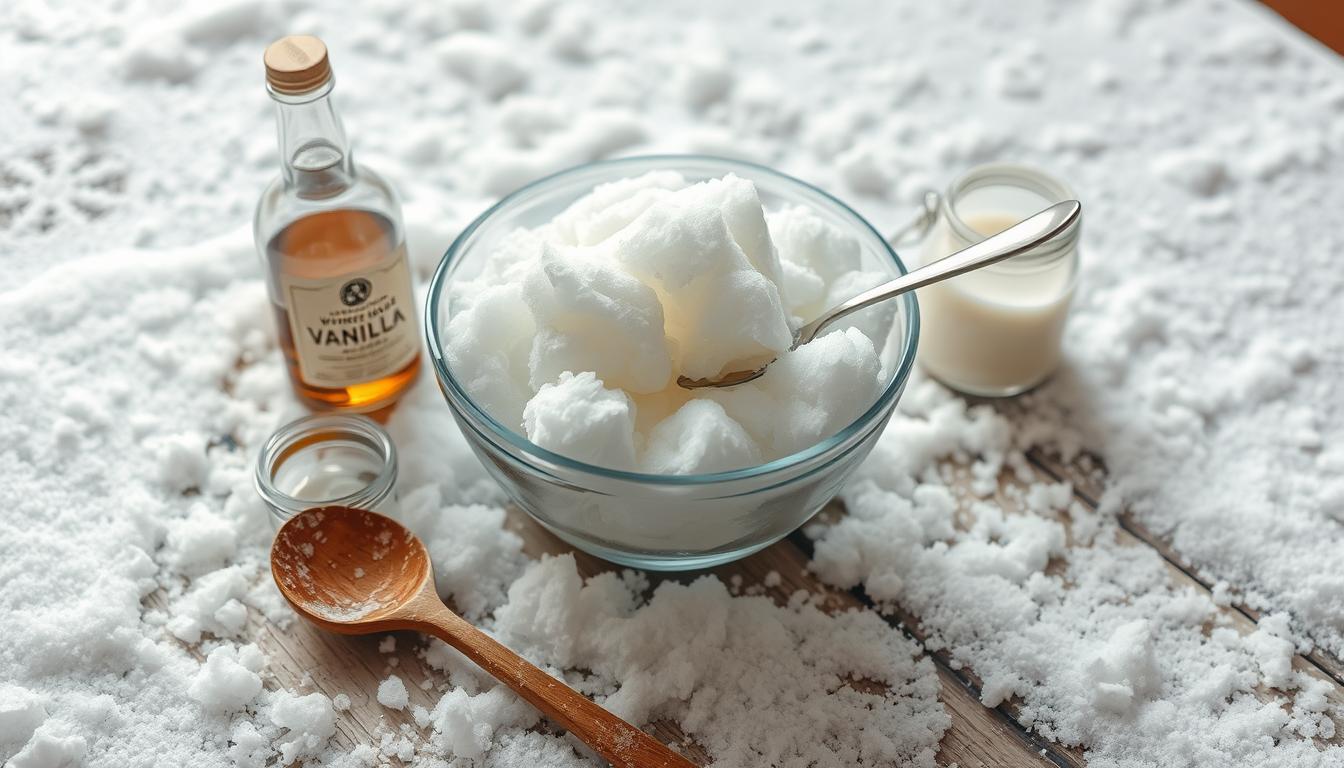
Essential Ingredients for Perfect Snow Ice Cream
Making the best snow ice cream begins with knowing the key ingredients. These ingredients turn fresh snow into a tasty winter treat. Your creamy snow ice cream needs the right mix for a smooth and tasty dessert.
The basic ingredients for a classic snow ice cream recipe are easy to find. You’ll need:
- Fresh, clean snow
- Sweetened condensed milk or whole milk
- Granulated sugar
- Pure vanilla extract
Each ingredient is crucial for the perfect creamy snow ice cream. Snow is the base, milk adds richness and smoothness. Sugar makes it sweet, and vanilla gives it that classic ice cream taste.
| Ingredient | Purpose | Recommended Quantity |
|---|---|---|
| Fresh Snow | Base and texture | 8-10 cups |
| Sweetened Condensed Milk | Creaminess and sweetness | 1 can (14 oz) |
| Vanilla Extract | Flavor enhancement | 1-2 teaspoons |
If you follow a special diet, you can use different ingredients. Coconut milk is good for a dairy-free version. Maple syrup can replace sugar for a natural sweetness.
“The magic of snow ice cream lies in its simplicity and the joy of using nature’s freshest ingredient.” – Winter Dessert Enthusiast
The quality of your ingredients affects your snow ice cream’s taste. Always use fresh, clean snow and top-quality vanilla extract for the best flavor.
Required Kitchen Tools and Equipment
Making a family-friendly snow ice cream recipe is easy. You don’t need fancy gadgets. Most people already have what they need to make this tasty winter treat. Let’s look at the tools that will help you make it with ease.
Getting ready for your snow ice cream means gathering a few things. The best part is, you likely have most of these tools in your kitchen already!
Basic Tools for Snow Ice Cream Making
- Large mixing bowl (preferably stainless steel or glass)
- Measuring cups and spoons
- Whisk or large spoon for mixing
- Clean collection container for snow
Optional Equipment to Elevate Your Snow Ice Cream
These tools are not necessary but can make your snow ice cream better:
- Electric mixer for smoother consistency
- Ice cream scoop for perfect serving
- Rubber spatula for scraping bowls
- Flavor extraction tools like zesters or vanilla bean scraper
Snow Collection Containers
When collecting snow, use clean containers to keep it fresh:
- Large plastic storage containers with lids
- Clean buckets
- Shallow baking dishes
Pro tip: Always use food-safe containers. Avoid snow from areas near roads or animal tracks.
Snow Ice Cream Recipe: Basic Instructions

Making your own snow ice cream is simpler than you think! It turns fresh snow into a tasty dessert that everyone will enjoy. You only need a few ingredients and a little prep work.
To begin your snow ice cream journey, collect these key ingredients:
- 8 cups of clean, fresh snow
- 1/2 cup granulated sugar
- 1 cup milk (whole milk works best)
- 1 teaspoon vanilla extract
- Pinch of salt
Here’s how to make your snow ice cream:
- Collect clean snow in a large mixing bowl
- In a separate bowl, mix milk, sugar, vanilla, and salt
- Slowly pour the liquid mixture over the snow
- Stir gently until you reach a smooth, ice cream-like consistency
- Taste and adjust sweetness if needed
Pro tip: Work quickly to prevent the snow from melting. Mix ingredients just before serving for the best texture.
Your homemade snow ice cream is now ready to enjoy! It takes less than 10 minutes to make, perfect for a quick winter treat. Try different flavors or add toppings to make it your own.
Selecting and Collecting the Right Snow
Creating the best homemade snow ice cream starts with finding the perfect snow. The quality of your winter dessert depends on the snow you collect. This step is crucial for a delicious treat.
When preparing to make snow ice cream, location matters a lot. Not all snow is good for your dessert. You need to be strategic about where and how you collect your snow.
Best Snow Collection Methods
Follow these essential guidelines for collecting clean, fresh snow:
- Collect snow from areas away from roads and buildings
- Choose fresh, white snow that looks clean and untouched
- Use a clean, large plastic container for collection
- Avoid yellow or discolored snow patches
How to Test Snow Quality
Ensuring your snow is safe for homemade snow ice cream requires careful inspection. Look for snow that is:
- Pure white in color
- Free from visible debris
- Freshly fallen (within the last few hours)
- Collected from an unpolluted area
Storage Tips for Fresh Snow
To maintain the best snow ice cream quality, store your collected snow properly:
- Transfer snow immediately to a clean, cold container
- Keep snow in the coldest part of your freezer
- Use collected snow within 2-3 hours for optimal freshness
- Cover the container to prevent contamination
Pro tip: Always prioritize safety and cleanliness when collecting snow for your delicious winter treat!
Milk and Sweetener Options for Your Recipe

Creating the perfect creamy snow ice cream starts with choosing the right milk and sweetener combinations. Your traditional snow ice cream can transform dramatically based on the ingredients you select.
Different milk varieties can dramatically impact the texture and flavor of your snow ice cream. Consider these delicious options:
- Whole milk for a rich, traditional snow ice cream experience
- Almond milk for a lighter, nutty flavor
- Coconut milk for a tropical twist
- Oat milk for a creamy, plant-based alternative
Sweeteners play an equally crucial role in crafting your perfect creamy snow ice cream. Explore these delightful options:
- Granulated sugar for classic sweetness
- Maple syrup for natural, deep flavor
- Honey for a floral, smooth sweetness
- Condensed milk for extra richness
Your choice of milk and sweetener can create unique flavor profiles. Experiment with different combinations to discover your perfect snow ice cream recipe. Remember to adjust quantities to match your taste preferences and desired sweetness level.
Pro tip: Always use fresh, clean snow and high-quality ingredients for the best results!
Flavor Variations and Creative Add-ins
Making snow ice cream is a fun adventure when you try new flavors. Your snow ice cream can go from simple to gourmet with a few special touches.
Trying different flavors lets you make your snow ice cream your own. The basic recipe is a great base for your creativity.
Popular Flavor Combinations
- Classic Chocolate: Add 2-3 tablespoons of cocoa powder for a rich chocolate experience
- Vanilla Bean: Use vanilla extract or scrape a real vanilla bean for intense flavor
- Mint Chocolate Chip: Combine peppermint extract with chocolate chips
- Cookies and Cream: Crush your favorite sandwich cookies into the mixture
Seasonal Mix-in Ideas
Each season brings its own special flavors for snow ice cream. Winter is cozy, while summer is fresh and fruity.
- Winter: Cinnamon, nutmeg, crushed candy canes
- Spring: Fresh strawberries, lemon zest
- Summer: Fresh berries, tropical fruit chunks
- Fall: Pumpkin spice, apple pie spices
Kid-Friendly Toppings
Make your snow ice cream a hit with fun toppings kids will love.
- Colorful sprinkles
- Mini marshmallows
- Chocolate sauce
- Crushed candy bars
- Whipped cream
The secret to great snow ice cream is to have fun and try new things. Every batch is a new adventure for your family!
Tips for Perfect Consistency and Texture
Making the best snow ice cream is all about texture and consistency. You want it to be light, fluffy, and creamy. It should melt in your mouth perfectly. The trick is knowing how ingredients work together and a few special techniques.
First, focus on the snow-to-liquid ratio. Too much liquid makes it runny, too little icy. Aim for a soft, scoopable texture, like soft-serve ice cream.
- Use fresh, clean snow for the lightest texture
- Stir gently to prevent compacting the snow
- Work quickly to maintain the snow’s delicate structure
Temperature is key for creamy snow ice cream. Mix when the snow is fresh and fluffy. Use cold metal to keep it from melting too soon.
Try different milks to find your favorite texture. Whole milk makes it richer, while lighter milks are more delicate. Sweetened condensed milk or heavy cream can make it super smooth.
Pro tip: Chill your mixing bowl beforehand to keep your snow ice cream at the perfect consistency!
To avoid ice crystals, mix well but gently. Overmixing makes it hard. You want a light, airy treat that feels like fresh snow.
Storage and Serving Recommendations
Making an easy snow ice cream recipe is fun. But, knowing how to store and serve it is key for the best taste. Your homemade snow ice cream tastes best right after you make it.
Fresh snow ice cream is at its best with a delicate texture and bright flavor. If you must store it, here’s how to keep it fresh:
- Store in an airtight container
- Place in the coldest part of your freezer
- Consume within 2-3 hours for optimal taste
When you store homemade snow ice cream, it will change a bit. It will get firmer and lose some creaminess. To make it softer again, let it sit at room temperature for 3-5 minutes before serving.
Here are some tips for serving your easy snow ice cream:
- Use chilled bowls to keep the ice cream cold longer
- Scoop quickly to prevent melting
- Add fresh toppings just before serving
Remember, the magic of snow ice cream lies in its fresh, light texture – so gather your friends and family to enjoy it together!
Common Mistakes to Avoid When Making Snow Ice Cream
Making snow ice cream can be tricky for beginners. Knowing common mistakes helps you make perfect snow ice cream. Let’s look at the mistakes that can ruin your winter dessert.
Several challenges can face even experienced cooks when making snow ice cream. Success depends on paying close attention to detail. You need to understand how to turn fresh snow into a tasty treat.
Temperature Control Challenges
- Avoid using snow that’s too warm or partially melted
- Collect snow from clean, untouched areas
- Work quickly to prevent melting
Ingredient Ratio Complications
It’s important to get the right mix of ingredients for your snow ice cream. Too much liquid makes it soupy, while too little makes it dry.
| Ingredient | Common Mistake | Correct Approach |
|---|---|---|
| Milk | Adding too much | Gradually mix, adjust consistency |
| Sweetener | Uneven distribution | Stir thoroughly before adding snow |
| Snow | Using wet or packed snow | Choose light, fluffy fresh snow |
Timing and Mixing Errors
Your snow ice cream needs precise timing. Mixing too slowly can cause it to separate and have an uneven texture. Mix quickly and carefully to keep it smooth.
“The key to perfect snow ice cream is speed and precision!” – Culinary Expert
By knowing these common mistakes, you can make delicious snow ice cream. It will impress your family and friends.
Conclusion
Making snow ice cream is more than a recipe. It’s a winter tradition that brings families together. Your snow ice cream recipe can be a fun experience that creates lasting memories. With simple ingredients and creativity, you’ll turn fresh snow into a tasty treat for everyone.
The beauty of snow ice cream is its simplicity and flexibility. You can try different flavors and add unique mix-ins. Each batch is a special culinary adventure, whether it’s a classic vanilla or a bold new flavor.
Remember, safety and quality are crucial when collecting snow. Choose clean, fresh snow from untouched areas. By following the tips in this guide, you’ll make delicious snow ice cream that everyone will love.
Enjoy the winter season with this homemade treat. Your snow ice cream recipe is more than a dessert. It’s about creating joyful moments and traditions that your family will cherish for years.